Load Data Base versions 9.6 and earlier
How to Load a private database supplied by OLI Systems?
Currently OLI Systems, Inc. only supplies user databases (formerly known as private databases) in the OLI/ESP format. This is not directly usable by the OLI/Analyzers. These databases are normally compressed using a program such as WinZip .
Please decompress (unzip) the file into a working folder. Where should you unzip the contents of the database? Usually OLI recommends to avoid the desktop (although a folder in the desktop is fine). Anywhere in the \Program Files or \Program Files(x86) tree. We also recommend avoiding \ProgramData tree.
OLI creates a folder under \Documents called My OLI Cases we recommend you use this folder or a sub-folder to unzip the contents.
You will then need to load and convert the supplied database. Fortunately there is a tool to do this for you. Please follow these steps:
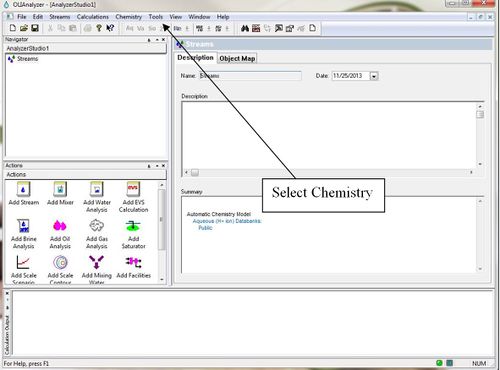
1. Start the OLI/Analyzer program.
2. Select Chemistry from the menu items.
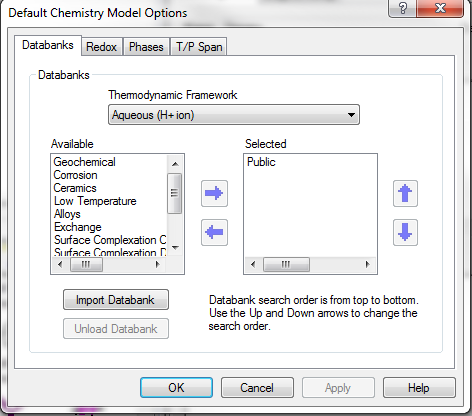
3. A drop down list will be displayed. Position the cursor on Using Model options and click.
This will display a list of loaded databanks. Note that you may not have all the databases listed below.
4. To begin the procedure of loading your database, click the Import Databank button.
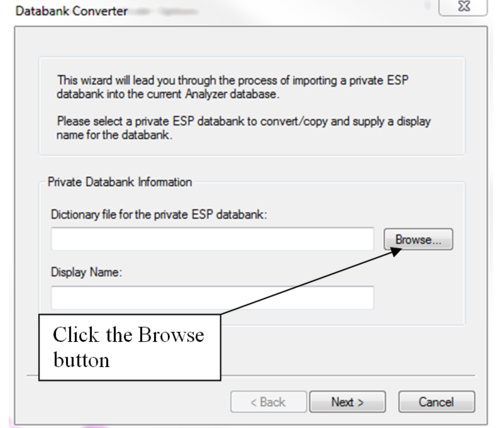
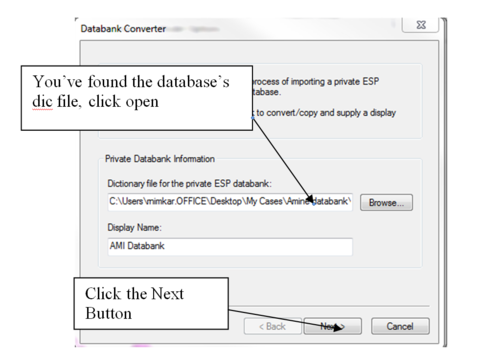
The databank converter wizard will now start. You can enter your own name and enter the path to the supplied databank directly. We recommend that you leave the Name field blank. This will use the same name as the OLI/ESP format databank.
If you are loading a databank with a name that already exists in the list, please use a new name.
5. Finding your OLI/ESP database may be difficult. We recommend that you click the Browse…button.
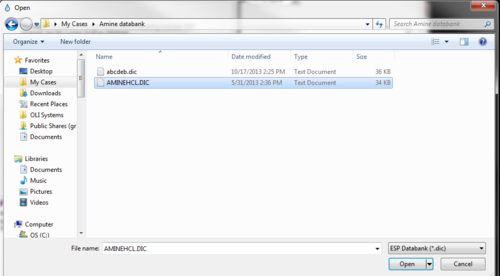
The standard windows open dialog will be displayed.
6. Locate the folder where the OLI/ESP format database is located.
The base file for the OLI/ESP database is the *.DIC file (for dictionary file).
7. Once you have found it, click the Open button
8. We are now ready to begin the conversion process. Click the Next button.
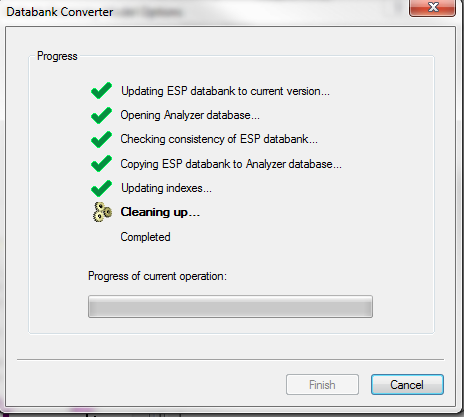
The program will begin the process of converting the files. A progress bar is displayed.
9. When the procedure is completed, click the Finish button
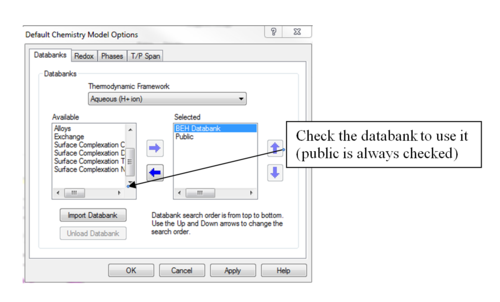
The new database is displayed on the Select Databanks dialog. To actually use the data contained in the database, you must check the new database.
Click the OK button to return to the Analyzer.
This was OLITips02
