Difference between revisions of "Quick Method of Importing a new OLI model into Aspen Plus"
(Created page with " == How to import a new OLI chemistry model into an existing Aspen PLUS flowsheet? == This is a quick way of importing a model. What we have said is actually not true. What w...") |
|||
| Line 17: | Line 17: | ||
How to use the OLI Chemistry Wizard is described in detail elsewhere so we will only touch on the important points. | How to use the OLI Chemistry Wizard is described in detail elsewhere so we will only touch on the important points. | ||
| + | |||
| + | Use the '''Browse''' button to select a working folder and enter the name of your model. For our example we are using the name '''Test1''' | ||
| + | |||
| + | It is important to note that the generated OLI file and the Aspen Plus flowsheet file (BKP or APW) must both reside in the same folder. | ||
| + | |||
| + | [[File:2014-11-05 14-06-37.png]] | ||
| + | |||
| + | Click the '''Next''' button to continue. | ||
| + | |||
| + | [[File:2014-11-05 14-08-04.png]] | ||
| + | |||
| + | From this dialog you can select any additional databases and the thermodynamic framework. For our example will not be using any additional databases and will use the '''Aqueous''' framework. Click the '''Next''' button. | ||
| + | |||
| + | [[File:2014-11-05 14-11-46.png]] | ||
| + | |||
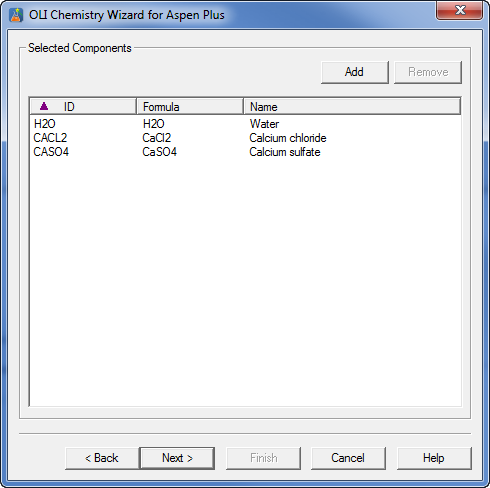
| + | For our example please add H2O, CACL2 and CASO4. Click the '''Next''' button to Continue. | ||
Revision as of 12:13, 5 November 2014
How to import a new OLI chemistry model into an existing Aspen PLUS flowsheet?
This is a quick way of importing a model. What we have said is actually not true. What we are going to do is create a new Aspen PLUS flowsheet using the OLI Chemistry Wizard (this creates the BKP file) and then copy and paste the existing flowsheet into the new flowsheet.
For our example we are using Aspen Plus V8.4 and the OLI engine 9.1.5.
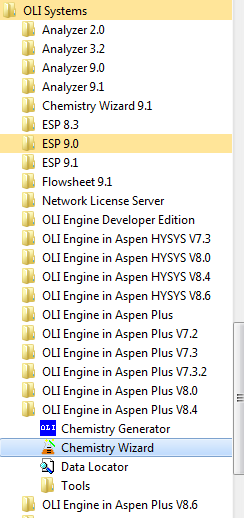
Let's create a new OLI Chemistry Wizard file for Aspen PLUS V8.4. To do this locate the OLI Chemistry Wizard from the Start Menu or desktop icon.
As you can see we have a lot of Aspen products installed.
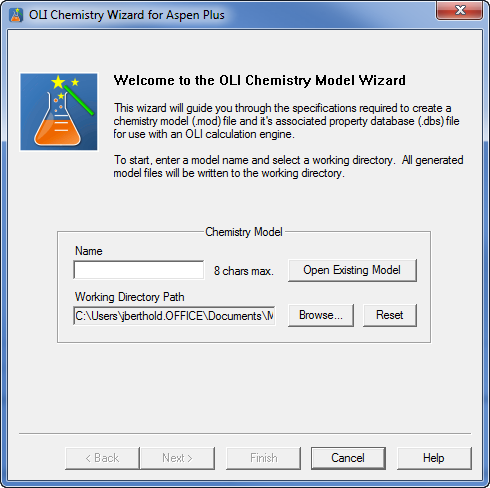
After starting this program you should see a dialog similar to this:
How to use the OLI Chemistry Wizard is described in detail elsewhere so we will only touch on the important points.
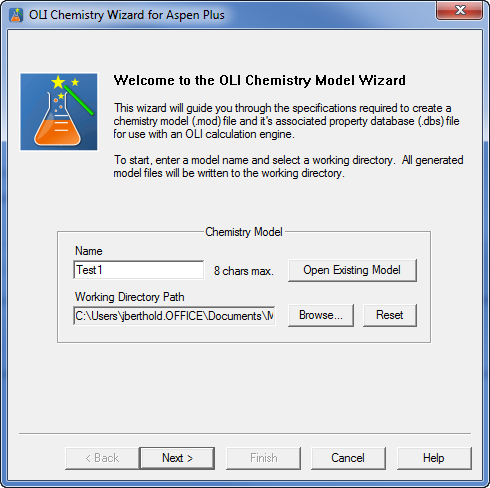
Use the Browse button to select a working folder and enter the name of your model. For our example we are using the name Test1
It is important to note that the generated OLI file and the Aspen Plus flowsheet file (BKP or APW) must both reside in the same folder.
Click the Next button to continue.
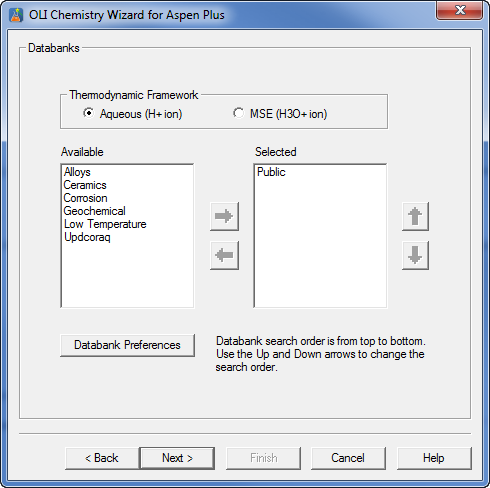
From this dialog you can select any additional databases and the thermodynamic framework. For our example will not be using any additional databases and will use the Aqueous framework. Click the Next button.
For our example please add H2O, CACL2 and CASO4. Click the Next button to Continue.
