Importing OLI Model in Aspen PLUS
We have created this example to help user better understand the use of OLI inside of Aspen PLUS. Please refer to the flow sheet of the example we are about to see
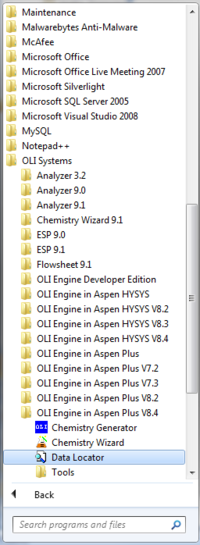
Now to activate OLI in Aspen PLUS , please make sure you have the correct OLI engine installed for your designated version. You can Confirm this at Programs-> All Programs-> OLI systems->OLI Engine in Aspen Plus 8.4
There are two possibilities for the import scenario between ASPEN and OLI. First is where there is no chemistry model built for the ASPEN simulation created by the user and they entirely need to use OLI chemistry. And second is when users have ASPEN chemistry for the simulation they have built and need OLI chemistry for certain sections ( subflowsheet) or certain blocks.
Let us begin with the first possibility when the simulation contains no chemistry inbuilt on the ASPEN side.
Chemistry model generation using OLI chemistry wizard
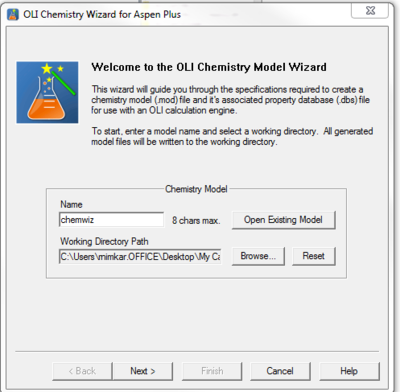
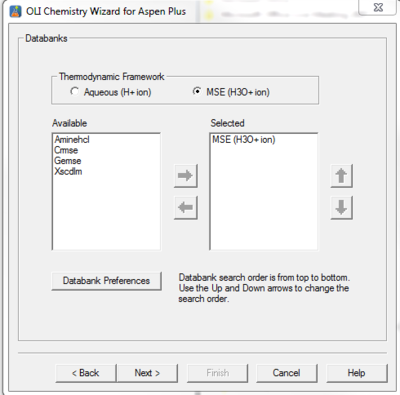
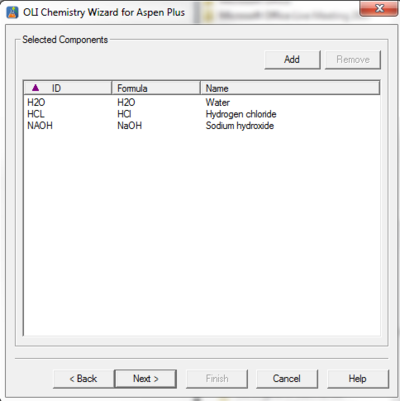
In this section we will talk about generating an electrolyte Multiple Solvent model ( MSE) which uses Hydronium ion for calculations. Build a chemistry with Water, HCL, NaOH using OLI chemistry wizard for Aspen Plus 8.4. Open Chemistry Wizard from the location shown in the above image. Following screen should pop up.
If your focus is not how the Hydrogen ion is treated then AQ or MSE either model should work, depending on what chemistry you are working with.
Next is selecting components from the list.
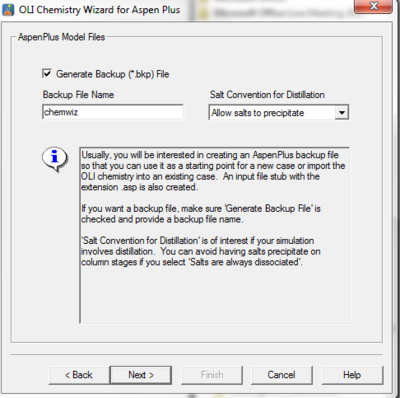
Keep pressing next till you see a message to create a *.bkp file. This is the file we will be using in Aspen for simulation.
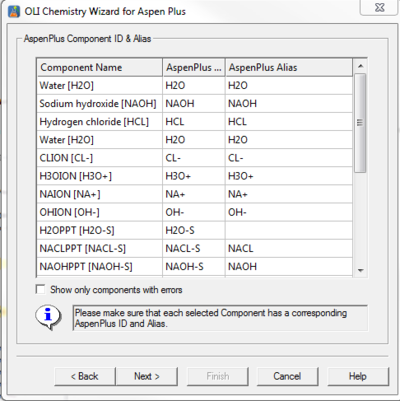
You will see an Aspen ID screens, please make sure you write up all the Alias names.
The next screen you will see is the generation of bkp files screen.
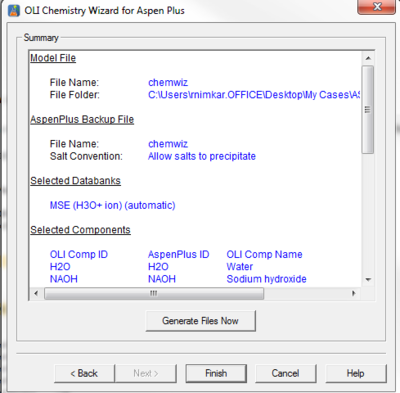
Next screen will give a summary of file generation. Please click "Generate Files Now" and then click Finish.
This completes the chemistry model generation step.
Generating a simulation in Aspen Plus
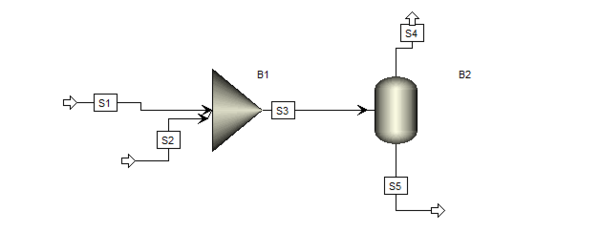
Go to the simulation environment in Aspen Plus 8.4 and add a Mixer and a Separator.
Add two input streams to the mixer and two output streams from the separator. Your flowsheet should look like below:
In the Methods Specifications, do not specify any model at this point
| Stream 1: H20 10 kmol/hr | Stream 2 : H20 10 kmol/hr |
| Stream 1:HCL 1 kmol/hr | Stream 2 :NaOH 1.1 kmol/hr |
| Temperature 25 C | Pressure 1 bar |
Save this file as Simulation1.bkp in the same location and same folder as the chemwiz.bkp file.
Importing an Aspen Simulation in OLI generated bkp file
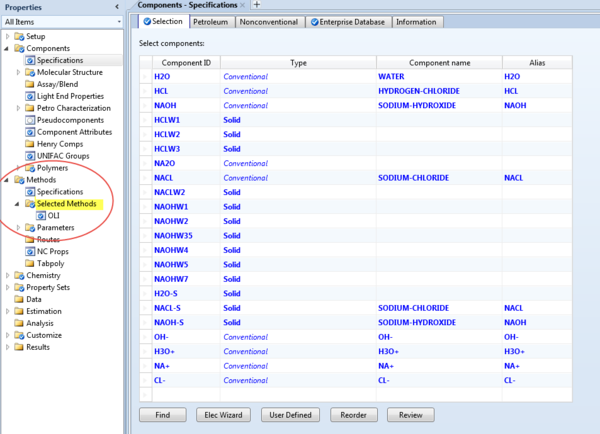
Please open the chemwiz.bkp file using Aspen Plus 8.4. Go to Property Section and make sure the Selected method is OLI. The Simulation section will be blank.
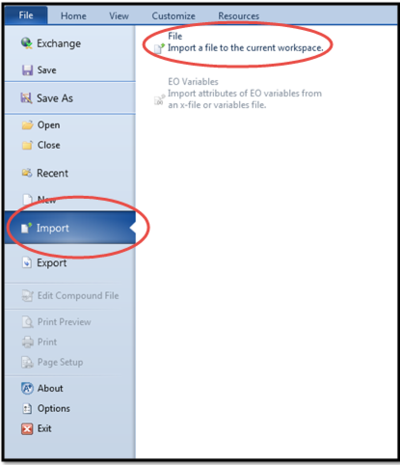
Now we have to import the simulation file with the chemistry model as generated before to this bkp file. To do that , go to File-> Import-> File
Go to the location as shown in Figure 2, your Simulation 1 file should be saved there as instructed in Section 1.2. Now you will have a complete file with a chemistry model and a valid simulation.
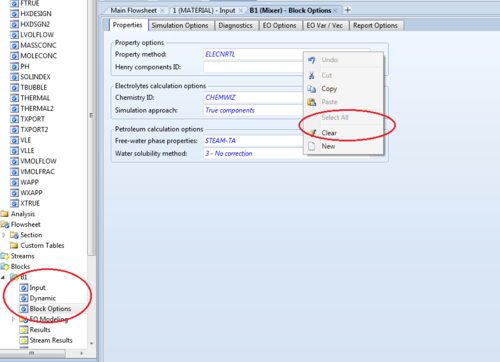
If you want to clear a property method from the simulation or a block , use the clear function from right mouse click on the Property method or Chemistry IDs. This is also the place to select individual chemistry models for you blocks. Since the simulation itself is imported inside CHEMWIZ, the parent model is OLI here.
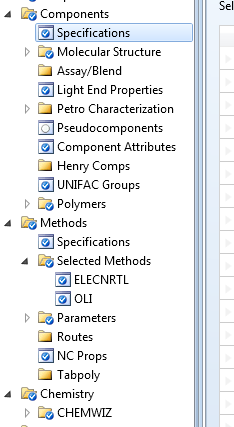
Under Properties, you should see more than one Chemistry IDs under Chemistry. As you can see there are two selected methods ElECNRTL and OLI. In case you are missing Chemistry IDs here, you may have to manually enter a new Chemistry ID under the property method originally created using Aspen for the file Simulation 1, which in this case is ELECNRTL. I am going to name this new Chemistry ID as Global and you will have to input the reactions and component selections for this Chemistry ID using ElecWizard options in Aspen.
